eRS supports single sign-on (SSO) logins through SAML 2.0. OneLogin is one of the widely used SAML 2.0 identity providers (IDP) which can be configured to provide authentication for eRS. OneLogin is an enterprise-grade, identity and access management service, built for the cloud, that is primarily used to provide their users with a Single Sign-on (SSO) experience.
Requirements
To use OneLogin IDP to log in to your eRS instance, you need the following:
- An active OneLogin subscription.
- Global Administrator access to OneLogin instance.
- An eRS Cloud instance and you must have subscribed to the 'Authentication Plus' module from the billing section.
After you meet these basic requirements, follow the steps below to add a SAML app integration in your OneLogin instance.
Step 1 - Create an Application in OneLogin instance
- Login to your OneLogin instance (https://yoursubdomain.onelogin.com/) with Global Administrator privileges, and click Administration button to access the Admin console.

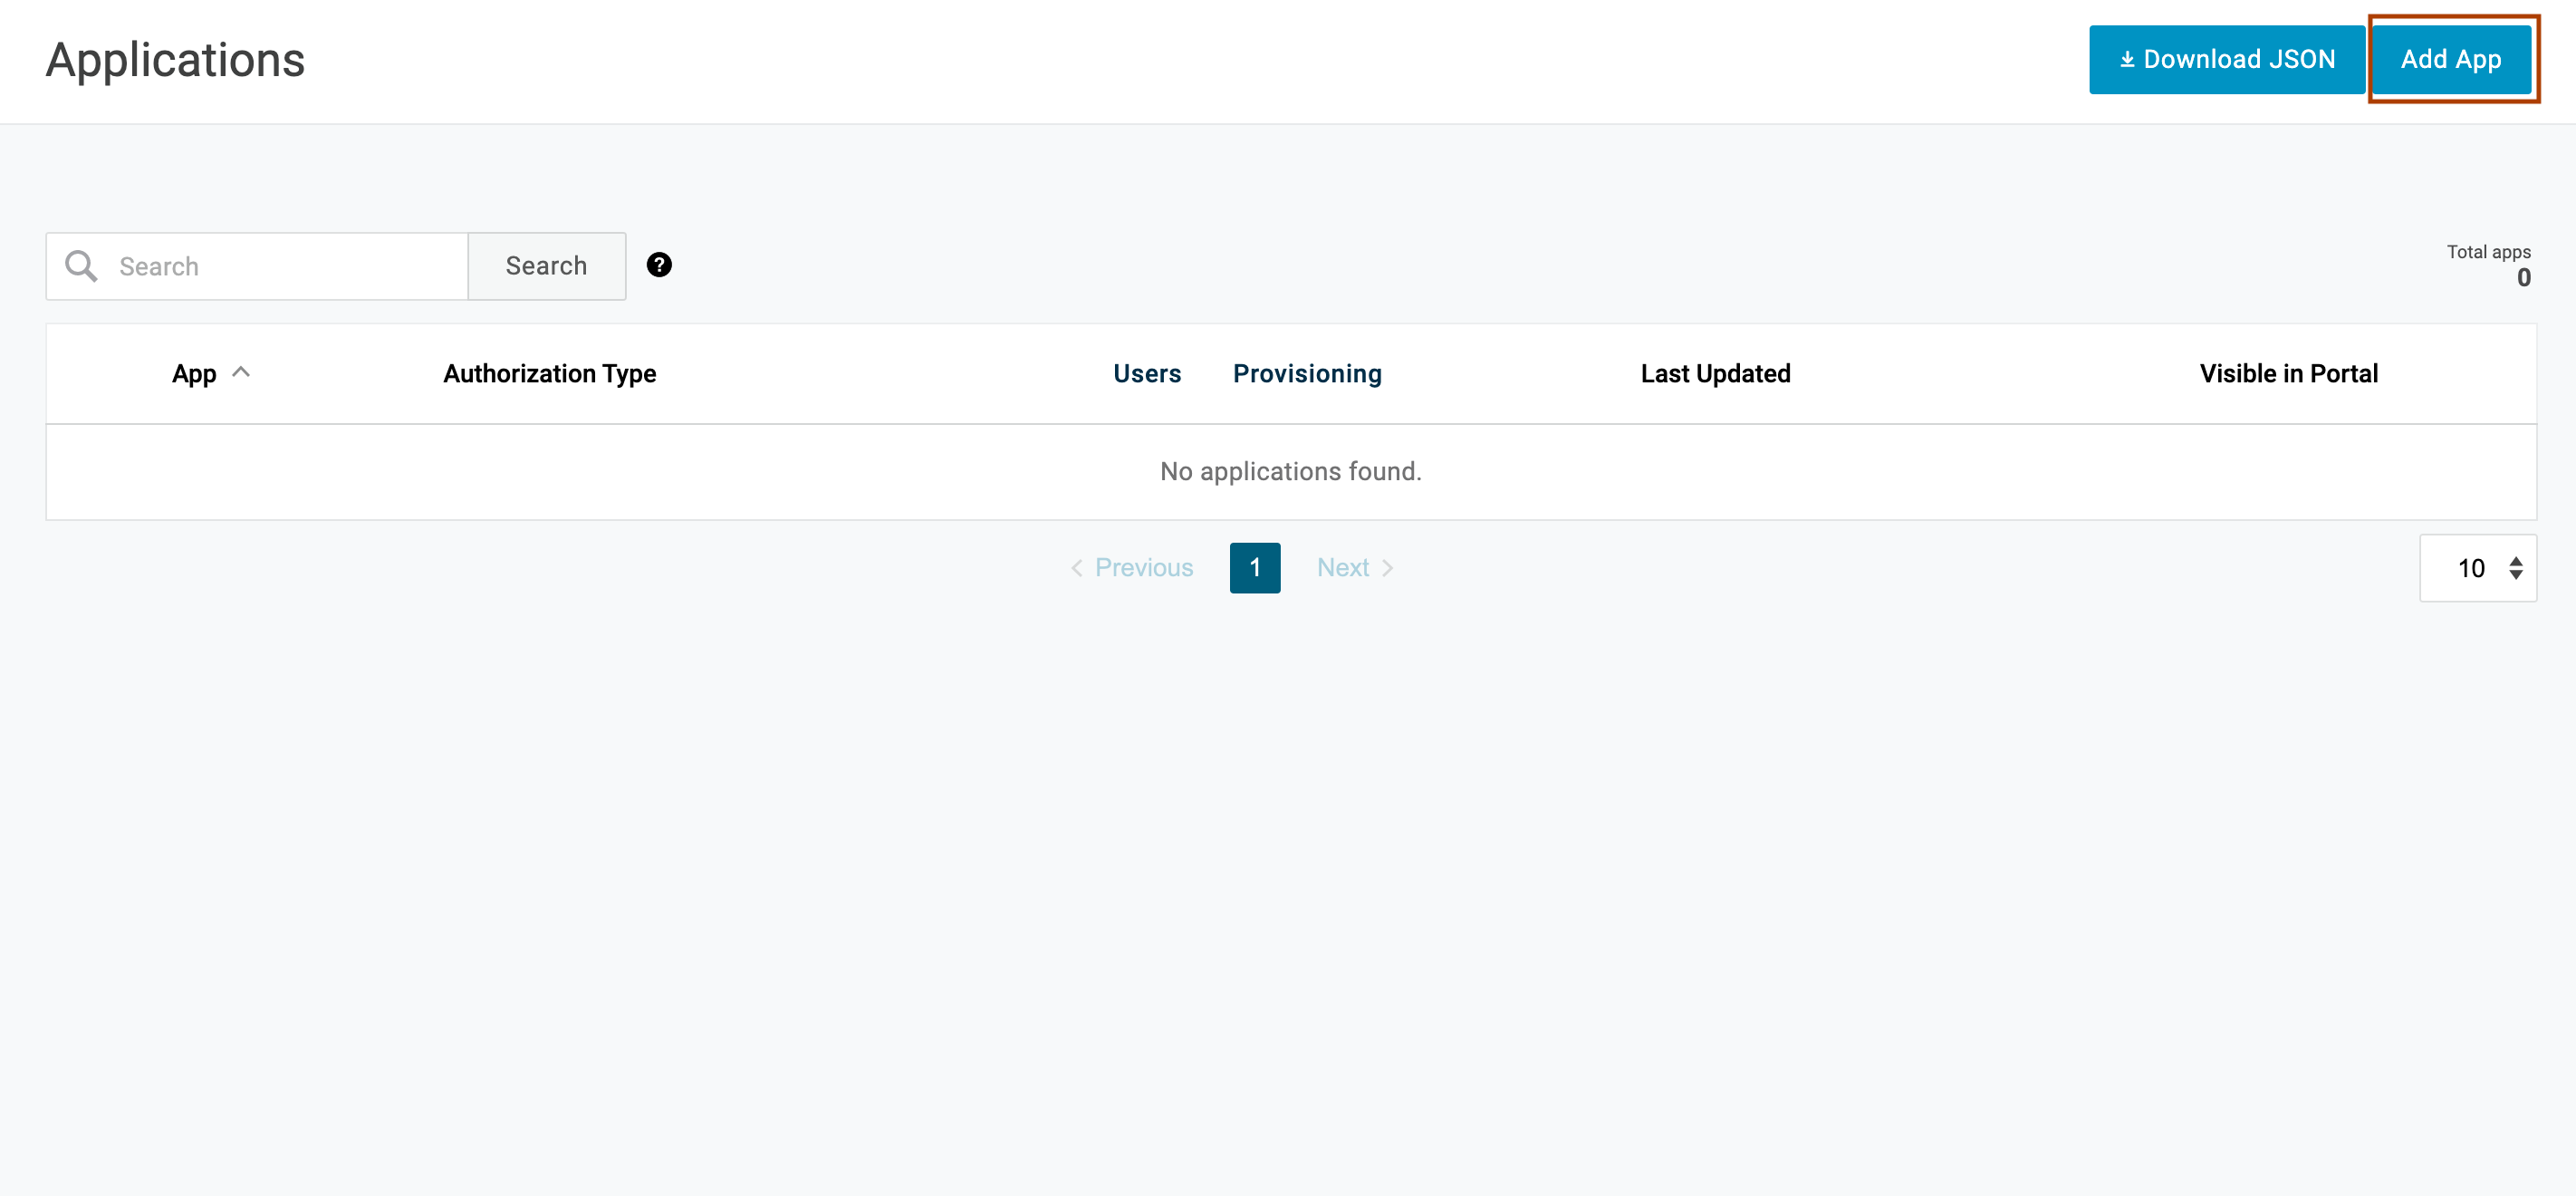
- On your OneLogin Admin console, navigate to Applications > Applications, and click Add App.
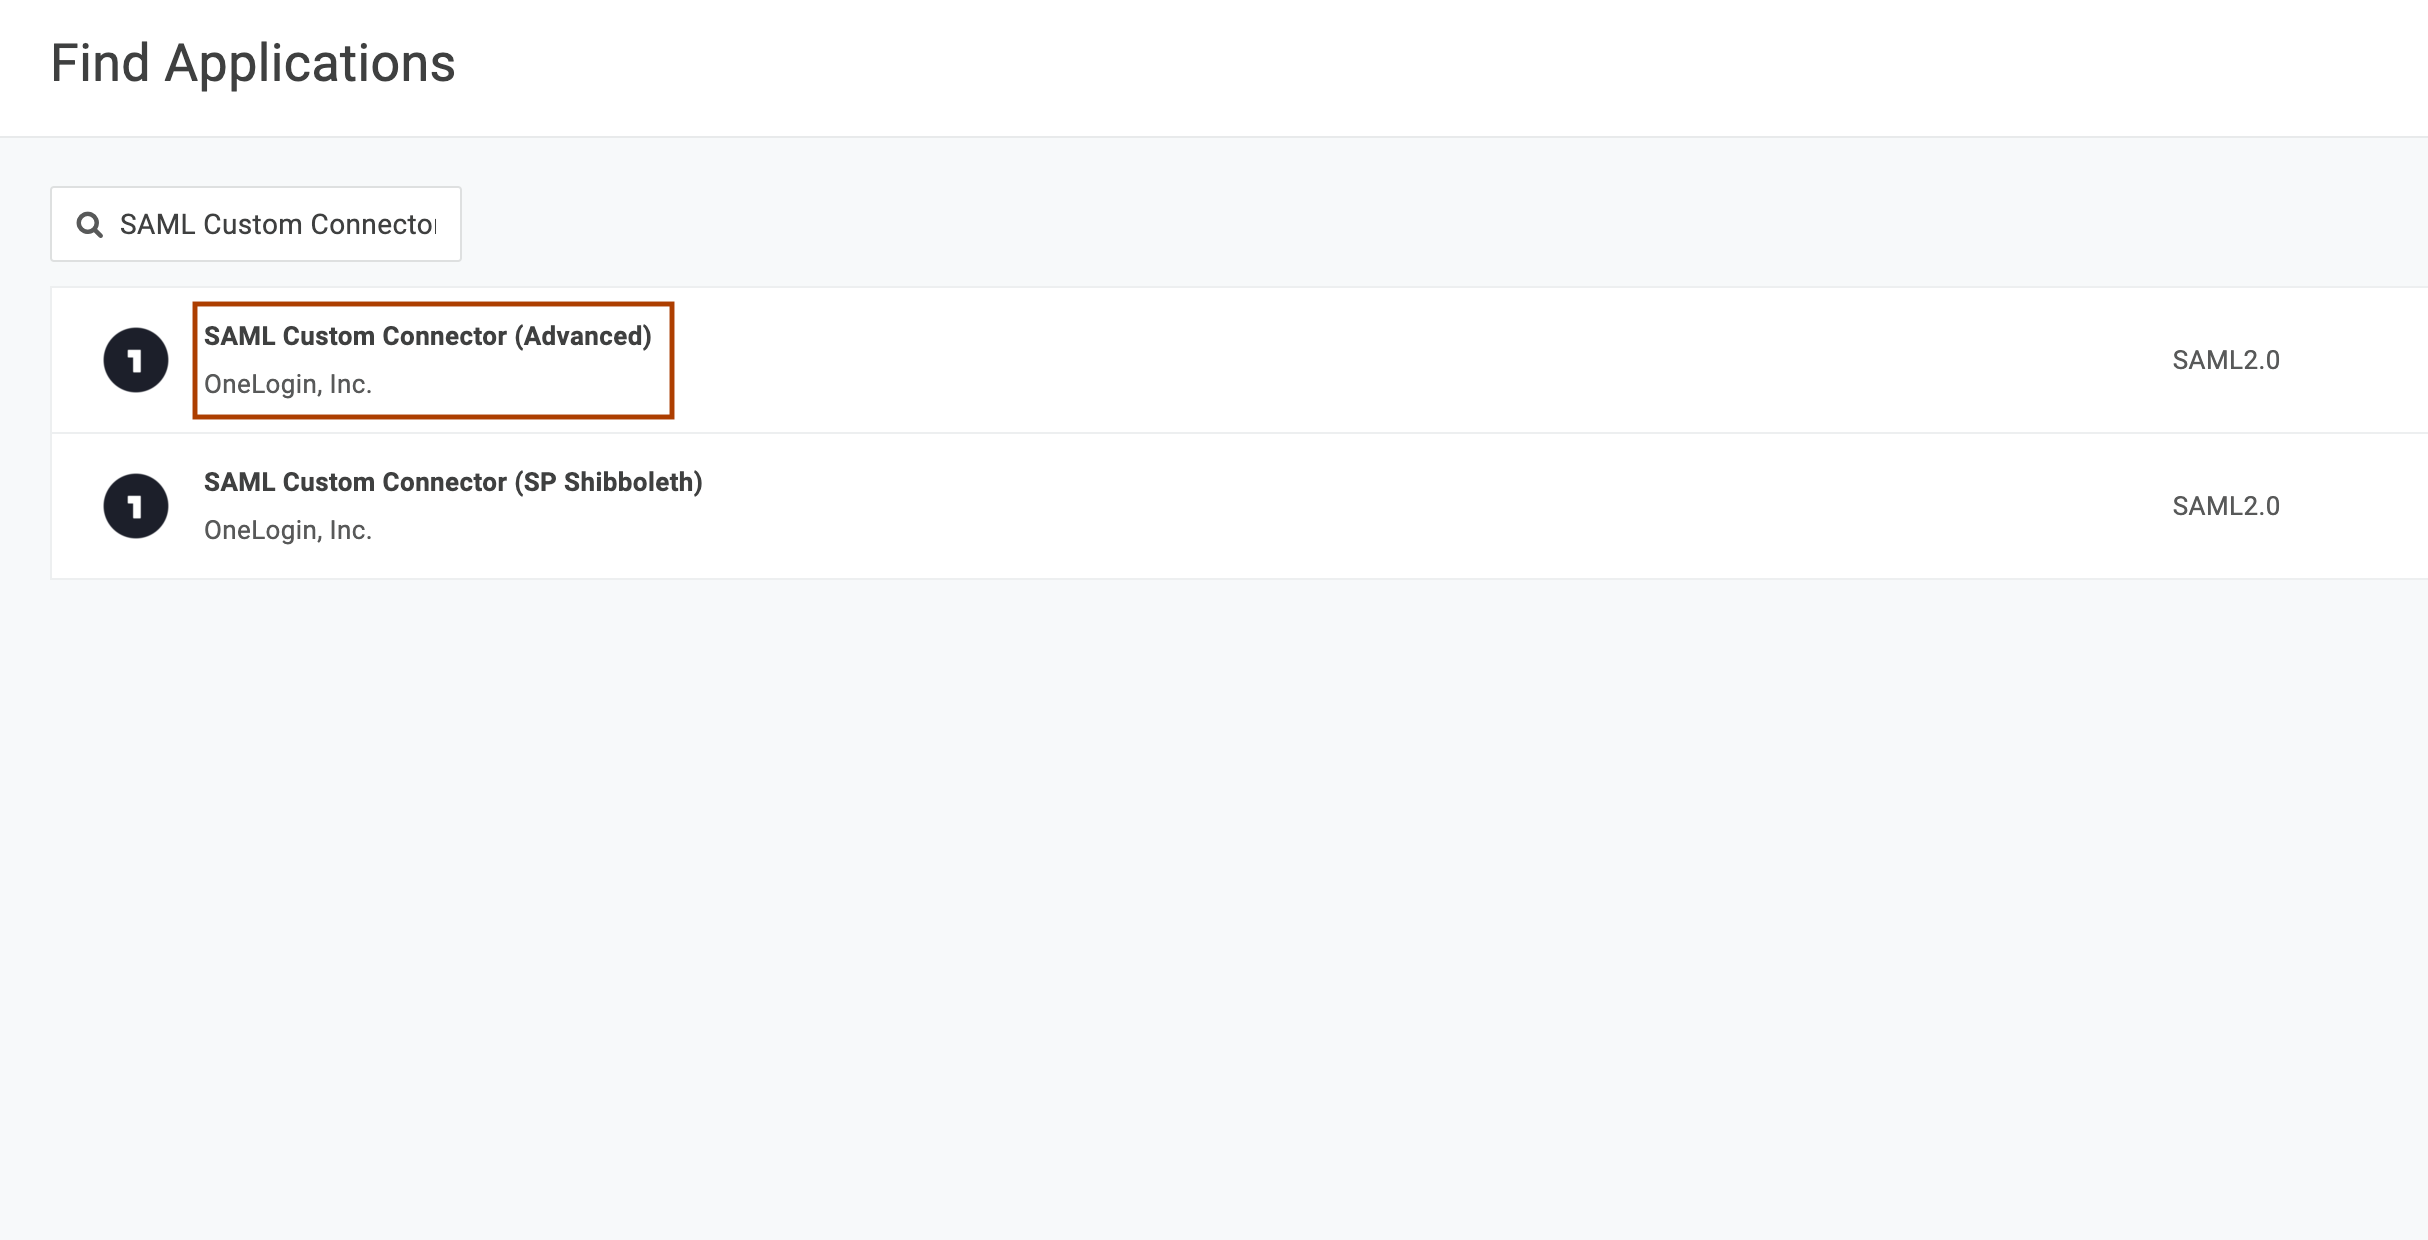
- In the search box type SAML Custom Connector, and click SAML Custom Connector (Advanced) to add new SAML app.
- Give the application a name (in this example eRS) and click Save

- From the left pane, select Configuration and fill in the following information and click Save.
Audience (EntityID): https://app.eresourcescheduler.cloud/Zit5huIxEPe9bfEk.
Recipient: https://app.eresourcescheduler.cloud/login/saml/123456. Replace 123456 with your eRS Account ID. If you don't know your eRS account ID, visit the Account Details page in eRS.
ACS (Consumer) URL: Same as the Recipient.
- From the left pane, select Parameters and add the following custom parameters using the '+' button:
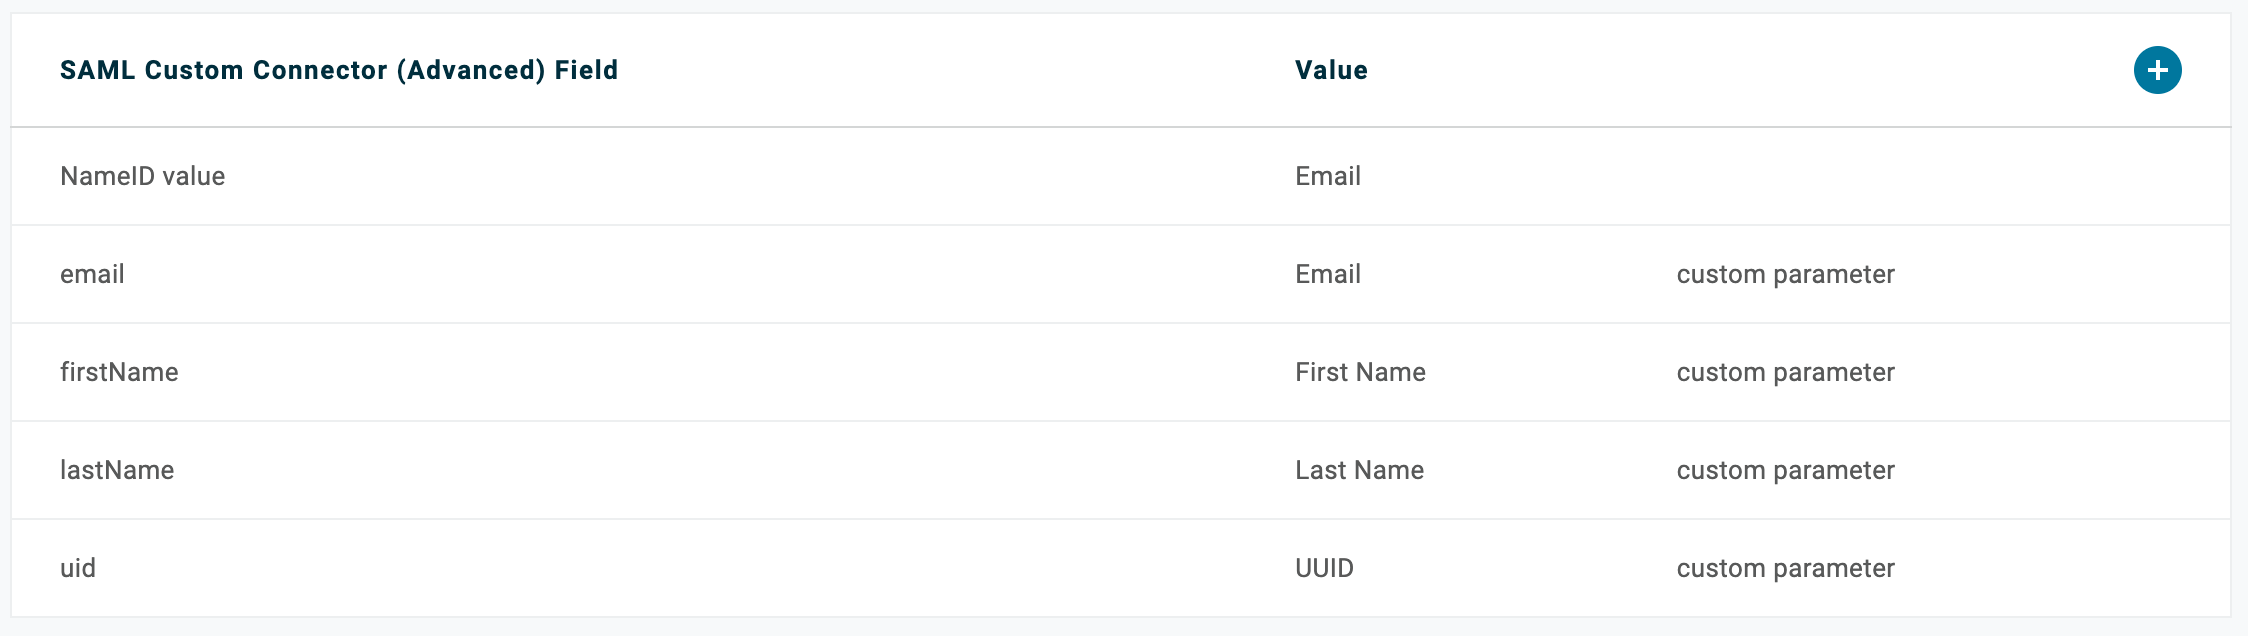
While adding the field, make sure to use exact same name and keep the Include in SAML assertion flag checked.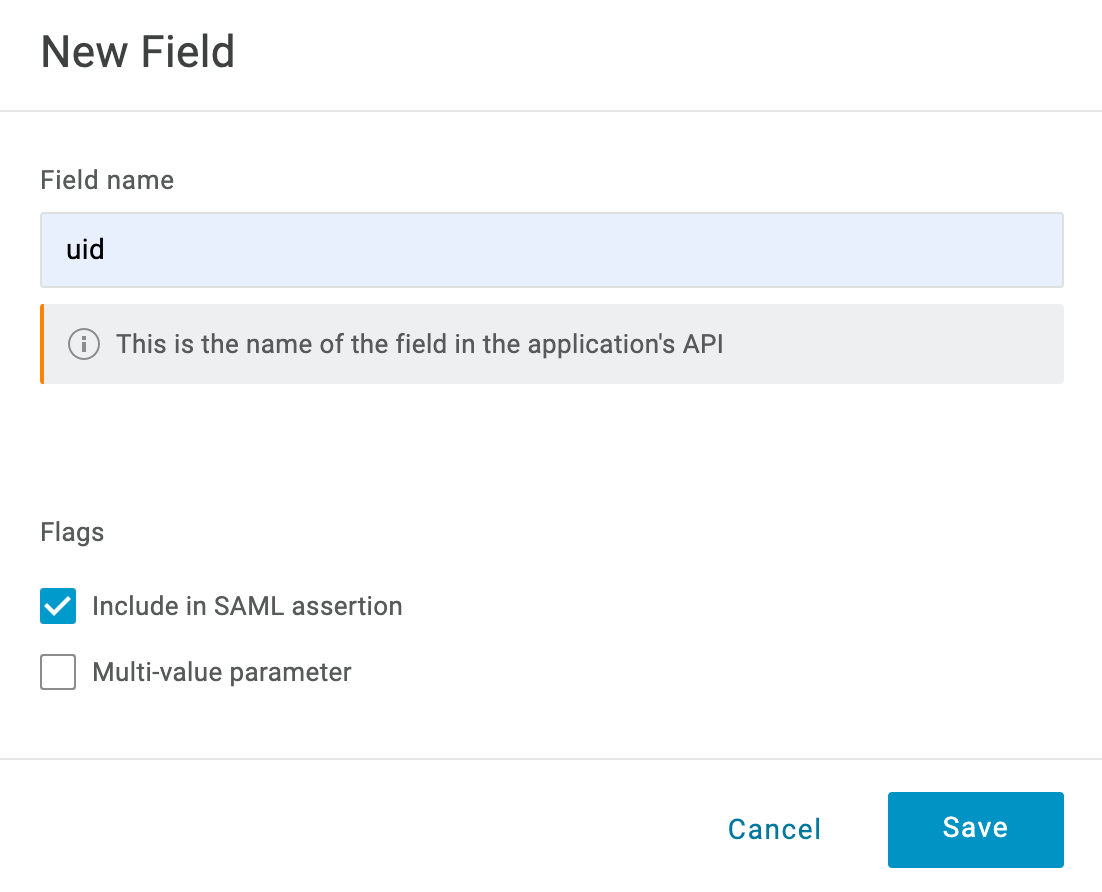
-
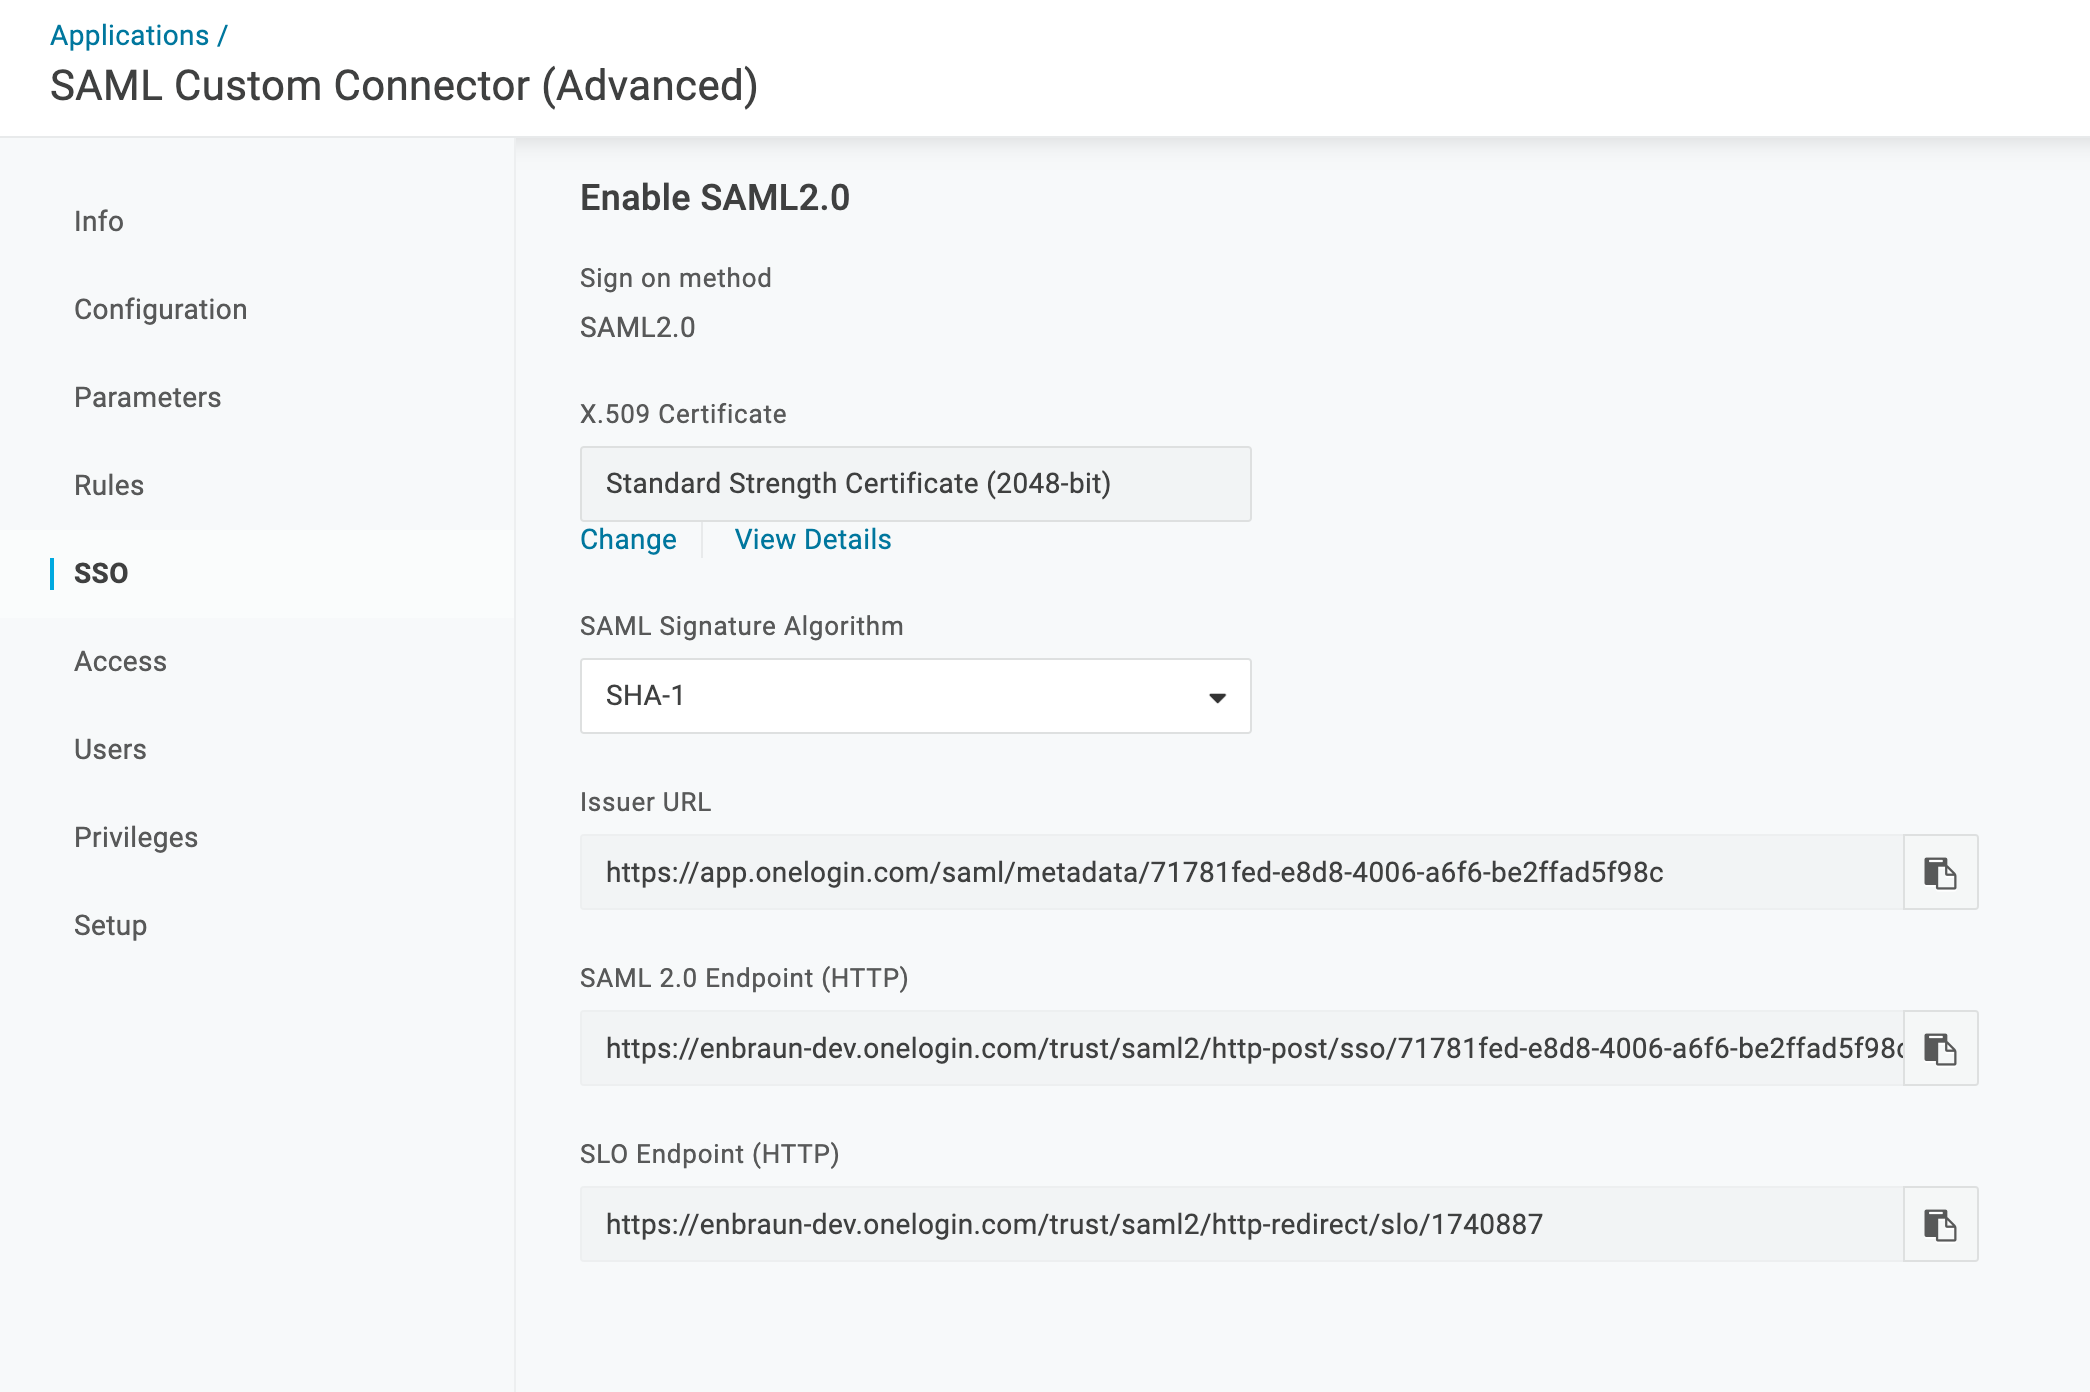
From the left pane, select SSO to get the SAML configuration. Click on View Details under X.509 Certificate to get the certificate.
Step 2 - Configure eRS
After creating an app in OneLogin Admin Console, you need to configure your eRS account to authenticate using SAML. To enable OneLogin SSO login for eRS, log in to your eRS account (with Admin privileges) and move to Authentication Settings in the Administration section. Click on the pencil icon to edit SAML configuration, enable the SSO and fill in the information from the previous step.
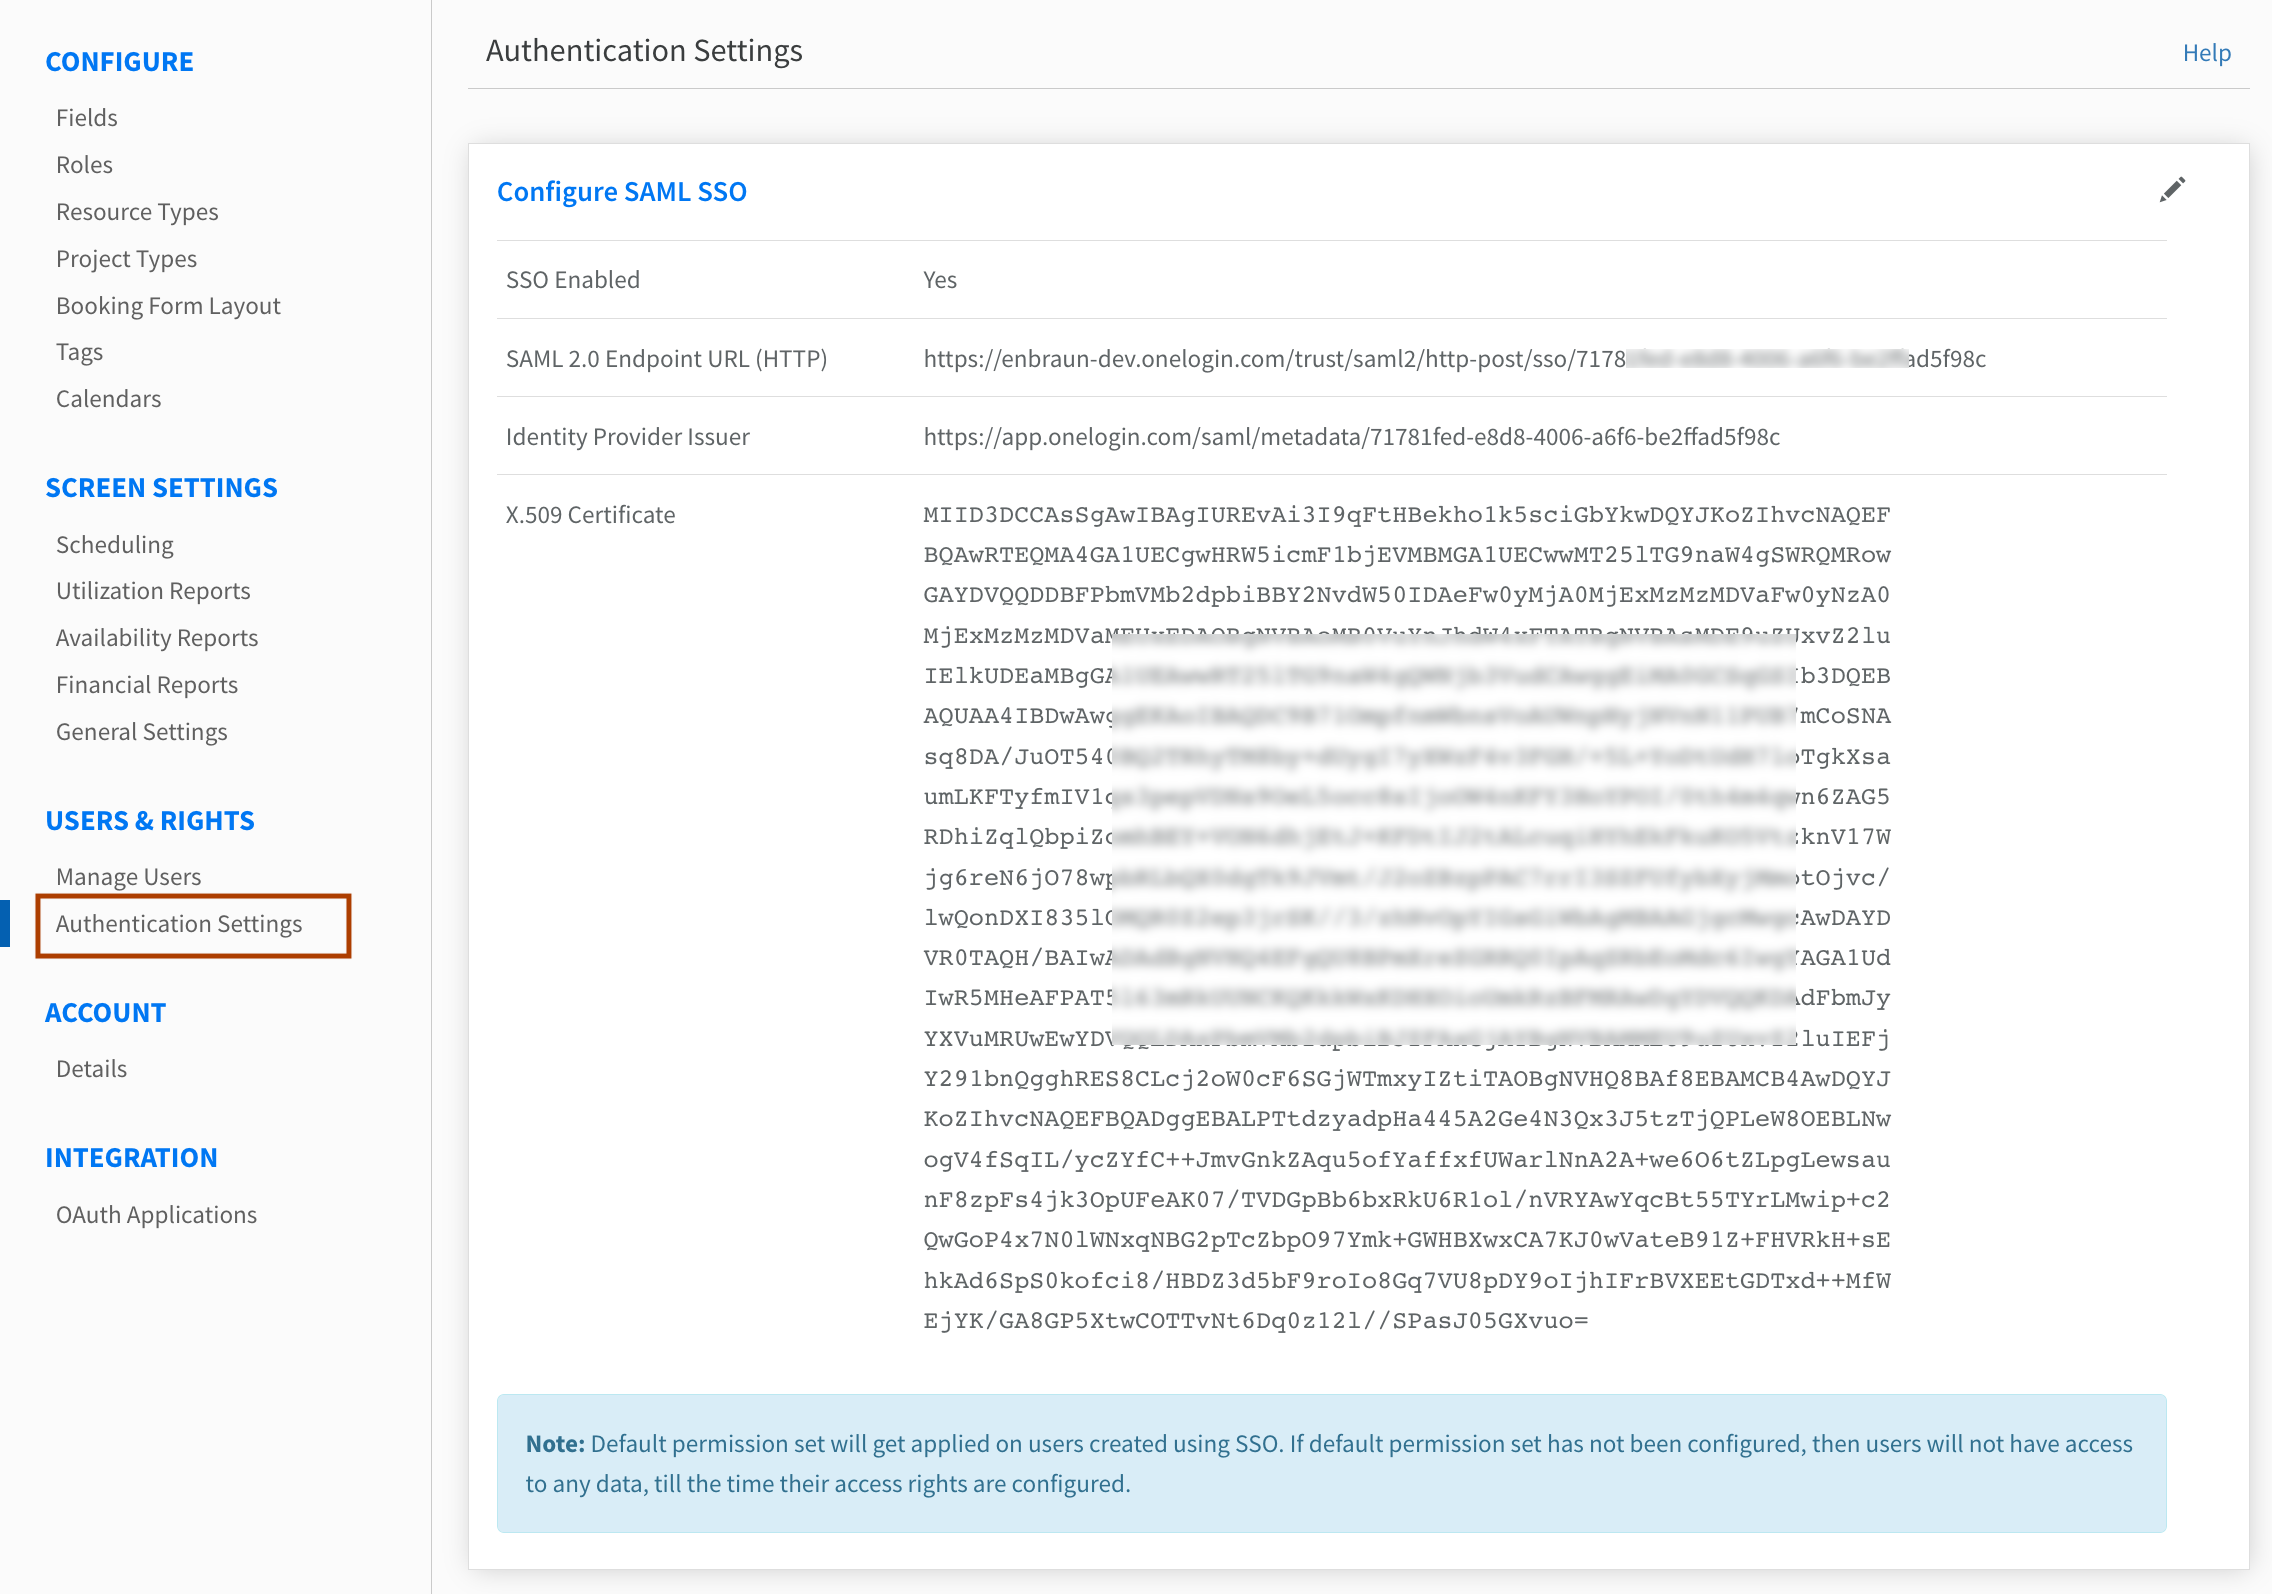
Note: Do not copy commented lines from the Certificate i.e. "---Begin Certificate----" and "---End Certificate---"
Step 3 - Assign eRS to Users
So far you have configured OneLogin and eRS for SAML authentication. Now you need to assign users to the eRS app in OneLogin admin console, to whom you want to grant access to eRS.
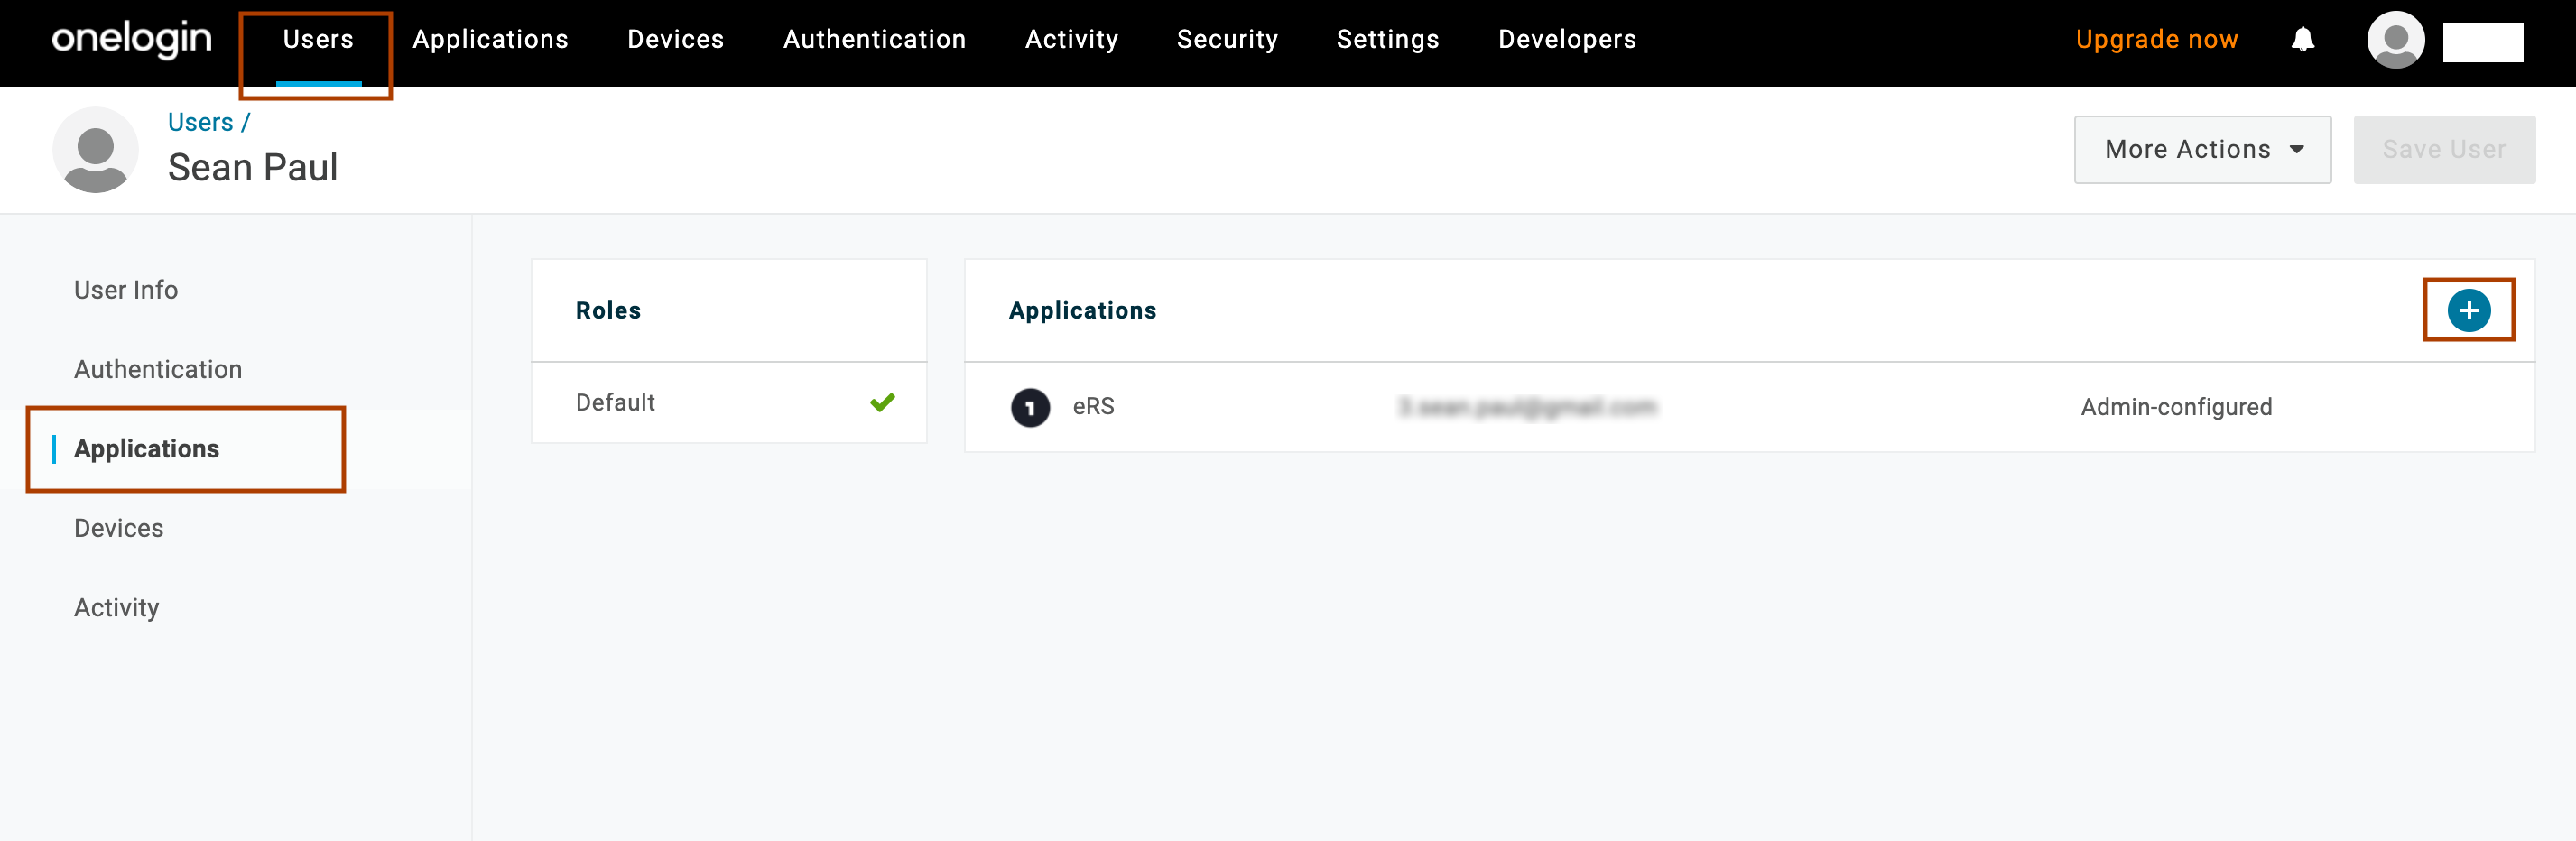
- In the OneLogin Admin Console and navigate to Users->Users and select a user to grant eRS application access.
- From the left pane, select Applications.
- Click (+) button, select eRS to add eRS application. Click Continue.
To check if OneLogin SSO login is working as expected, visit the SAML Login Page and enter your eRS Account ID to continue. It should redirect you to the OneLogin Sign-In page. Sign in as one of the users who was assigned the application access in the previous step. After a successful login, you will be redirected back to the eRS.
Important: When a user authenticates using SAML/SSO and logs into eRS for the first time, an entry for the user is created (if not already exist) with the default permission set applied. If the default permission set has not been configured, users will not have access to any data until their access rights are configured. You can create and mark permission set as default here.
You can also use the URL https://app.eresourcescheduler.cloud/login/saml/123456, replacing 123456 with your eRS Account ID, to directly reach the OneLogin login page after a successful SAML configuration.